Chocolate Peanut Butter Dream Cake


If you love the combination of rich chocolate and creamy peanut butter, this Chocolate Peanut Butter Dream Cake is the ultimate homemade dessert to try. With tender, deeply chocolatey cake layers, a smooth peanut butter filling, and a glossy chocolate topping that drips beautifully down the sides, every slice feels like a special occasion.
This cake is impressive enough for birthdays and celebrations but straightforward enough to make at home. The contrast between the slightly bitter richness of chocolate and the sweet, nutty peanut butter creates a perfectly balanced dessert that is hard to resist.
⭐ Why You’ll Love This Chocolate Peanut Butter Cake
- Rich and chocolatey – soft chocolate cake layers packed with cocoa flavor.
- Creamy peanut butter filling – smooth, sweet, and incredibly indulgent.
- Glossy chocolate ganache – adds an elegant finish and extra chocolate flavor.
- Perfect for celebrations – ideal for birthdays, holidays, parties, and family dinners.
- Make-ahead friendly – the cake can be prepared in stages, making assembly easier.
- Crowd-pleasing combination – chocolate and peanut butter are a classic pairing for a reason.
🛒 Ingredients
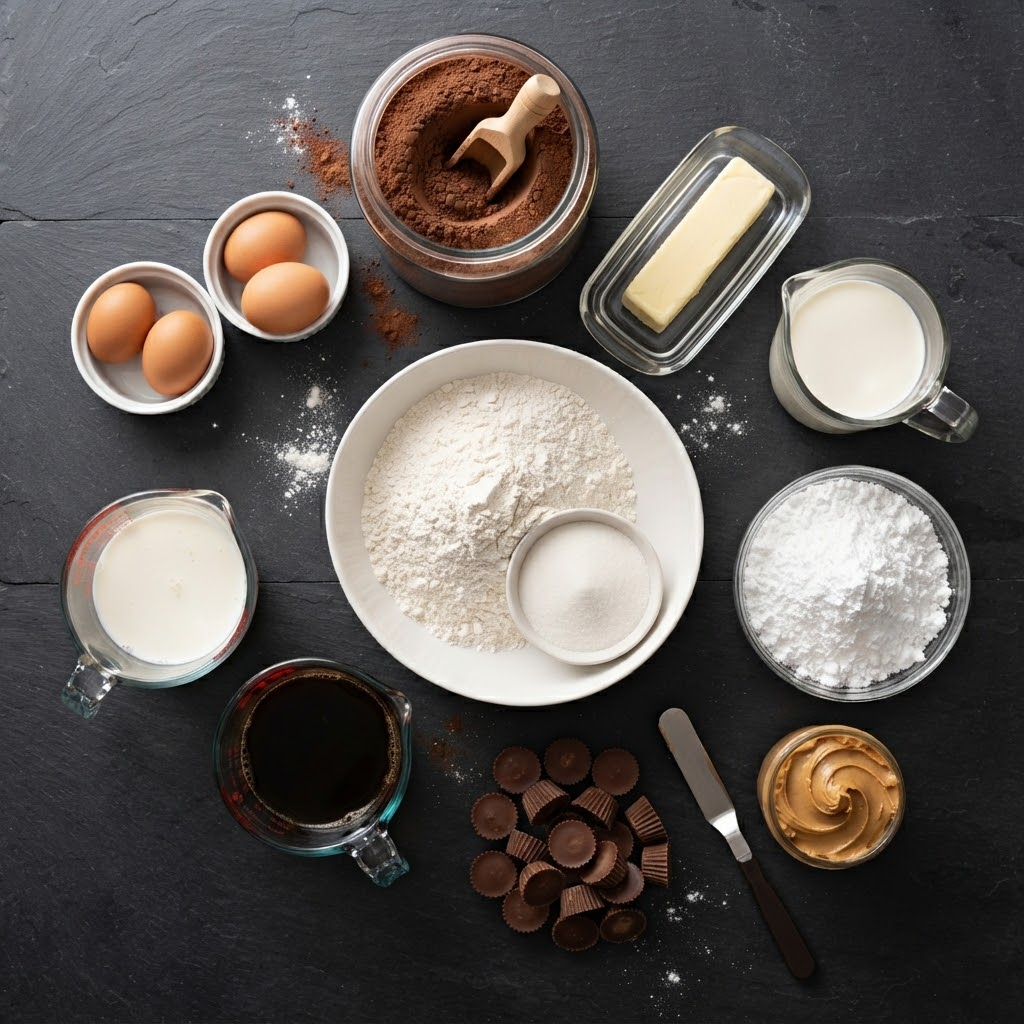
For the Chocolate Cake
- 2 cups all-purpose flour
- 2 cups granulated sugar
- ¾ cup unsweetened cocoa powder
- 2 teaspoons baking powder
- 1½ teaspoons baking soda
- ½ teaspoon salt
- 2 large eggs
- 1 cup buttermilk
- ½ cup vegetable oil
- 2 teaspoons vanilla extract
- 1 cup hot coffee or hot water
For the Peanut Butter Filling
- 1 cup creamy peanut butter
- ½ cup unsalted butter, softened
- 1½ cups powdered sugar
- 1 teaspoon vanilla extract
- 2–4 tablespoons heavy cream or milk, as needed
For the Chocolate Ganache
- 6 ounces semi-sweet or dark chocolate, finely chopped
- ¾ cup heavy cream
- 1 tablespoon butter, optional, for extra shine
For Decoration
- Mini peanut butter cups
- Chocolate shavings or chopped chocolate
- Crushed peanuts, optional
👩🍳 How to Make Chocolate Peanut Butter Dream Cake

1. Prepare the Cake Pans
Preheat your oven to 350°F (175°C).
Grease two 9-inch round cake pans and line the bottoms with parchment paper. Lightly dust the sides with cocoa powder or flour.
Preparing the pans properly makes it much easier to remove the delicate chocolate cake layers after baking.
2. Mix the Dry Ingredients
In a large mixing bowl, whisk together the flour, cocoa powder, sugar, baking powder, baking soda, and salt.
Make sure the cocoa powder is evenly distributed so the finished cake has a consistent chocolate flavor and texture.
3. Add the Wet Ingredients
Add the eggs, buttermilk, vegetable oil, and vanilla extract.
Mix until the batter is smooth and well combined.
Gradually pour in the hot coffee or hot water while mixing gently.
The batter will become relatively thin. This is completely normal. The hot liquid helps bloom the cocoa powder and contributes to a moist, tender crumb.
4. Bake the Cake
Divide the batter evenly between the prepared pans.
Bake for approximately 28–34 minutes, or until a toothpick inserted into the center comes out with a few moist crumbs.
Avoid overbaking because chocolate cake can quickly become dry.
Allow the cakes to cool in their pans for about 10 minutes before transferring them to a wire rack.
Let them cool completely before adding the peanut butter filling.
🥜 Prepare the Peanut Butter Filling
Place the softened butter and peanut butter in a large bowl.
Beat until creamy and smooth.
Gradually add the powdered sugar and continue mixing until the filling becomes fluffy.
Add the vanilla extract and enough heavy cream or milk to reach a smooth, spreadable consistency.
The filling should be thick enough to stay between the cake layers without sliding out.
Pro Tip
Use creamy, conventional peanut butter for the smoothest frosting. Natural peanut butter can sometimes separate and create a softer filling.
🍫 Make the Chocolate Ganache
Place the chopped chocolate in a heatproof bowl.
Heat the heavy cream until it is hot and just beginning to steam. Do not let it boil aggressively.
Pour the hot cream over the chocolate and let it sit for about 2–3 minutes.
Stir slowly from the center outward until the chocolate melts and the ganache becomes smooth and glossy.
Add butter if desired for an extra silky finish.
Allow the ganache to cool slightly before decorating the cake.
🎂 Assemble the Cake
Place the first chocolate cake layer on a serving plate.
Spread a generous layer of peanut butter filling over the top.
Place the second cake layer on top and gently press down to create an even stack.
Cover the top and sides with the remaining peanut butter frosting, creating either a smooth finish or a rustic appearance.
Finally, pour the slightly cooled chocolate ganache over the top.
Allow some of the ganache to naturally drip down the sides for that dramatic Chocolate Peanut Butter Dream Cake look.
Finish with chopped chocolate, crushed peanuts, or mini peanut butter cups.
❄️ Chilling the Cake
For the cleanest slices, refrigerate the assembled cake for approximately 30–60 minutes before serving.
This gives the peanut butter filling and ganache enough time to firm up slightly.
For the best texture, allow the cake to sit at room temperature for around 15–20 minutes before slicing.
🔪 Tips for Perfect Cake Layers
Cool the cake completely:
Never frost warm cake layers. Heat can soften the peanut butter filling and make the layers slide.
Use a serrated knife:
If your cakes have domed tops, carefully level them with a serrated knife before assembly.
Don’t overmix:
Once the dry and wet ingredients are combined, mix just until incorporated.
Let the ganache cool:
If the ganache is too hot, it can melt the peanut butter frosting.
Chill before slicing:
A short refrigeration period makes the layers much easier to cut cleanly.
🍽️ Serving Suggestions
Serve this cake as a spectacular dessert after a family dinner or alongside a cup of coffee or tea.
For an extra indulgent presentation, add:
- A scoop of vanilla ice cream
- Extra peanut butter drizzle
- Chocolate shavings
- Chopped roasted peanuts
- Mini peanut butter cups
- A small pinch of flaky sea salt
The combination of warm chocolate, creamy peanut butter, and crunchy toppings creates an especially satisfying dessert experience.
🧊 Storage
Store the finished cake covered in the refrigerator for up to 4–5 days.
Because the filling contains butter and dairy, keeping the cake chilled helps maintain its texture and freshness.
For serving, allow individual slices to sit at room temperature briefly before eating.
❓ Frequently Asked Questions
Can I make this cake ahead of time?
Yes. The chocolate cake layers can be baked a day in advance and stored tightly wrapped at room temperature or refrigerated.
Can I use milk instead of buttermilk?
Yes. You can make a simple buttermilk substitute by combining milk with a small amount of lemon juice or vinegar and letting it stand for several minutes.
Can I use milk chocolate?
Absolutely. Milk chocolate will create a sweeter, softer chocolate flavor. Semi-sweet or dark chocolate provides a stronger contrast with the sweet peanut butter filling.
Can I freeze the cake?
The unfrosted chocolate cake layers freeze very well. Wrap them tightly and freeze them for up to a few months for best quality. Thaw completely before assembling.
🍰Final Result
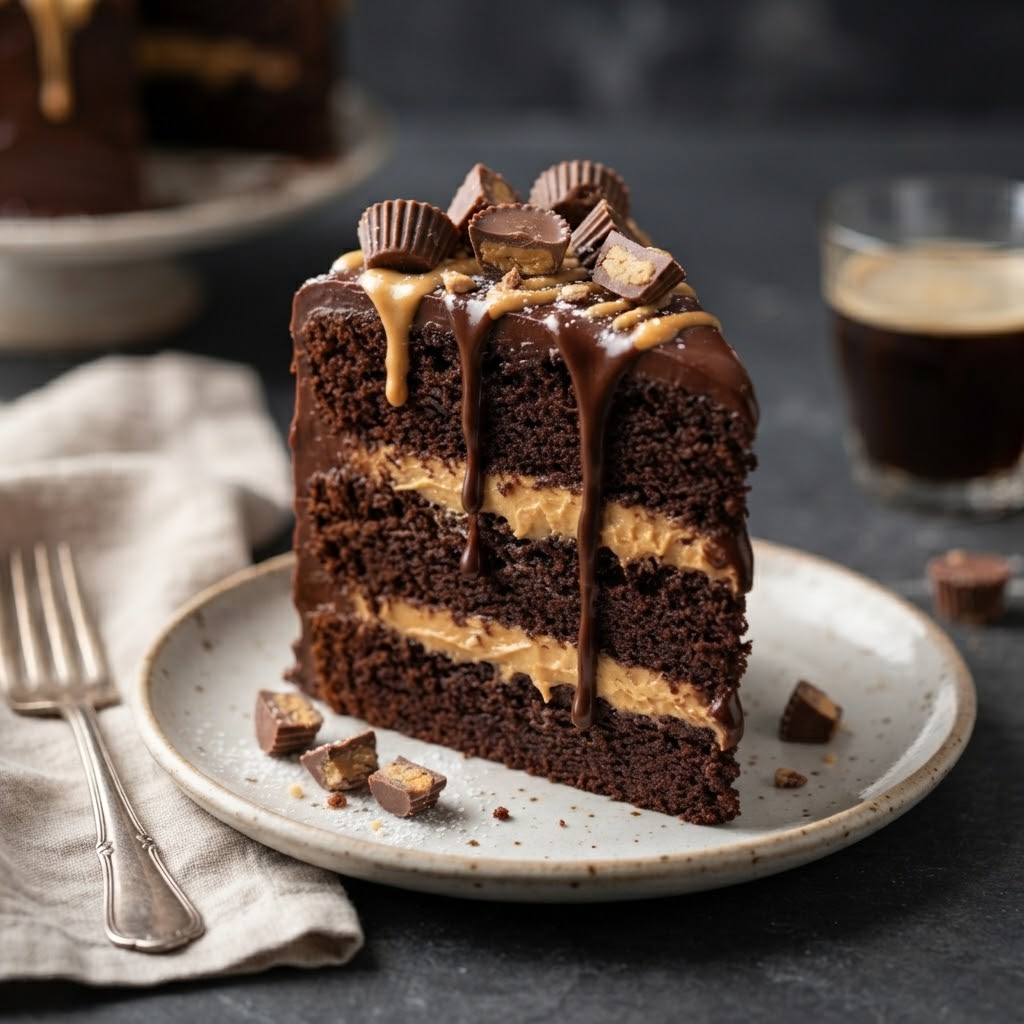
This Chocolate Peanut Butter Dream Cake is everything a decadent homemade dessert should be: moist chocolate cake, silky peanut butter filling, and rich chocolate ganache layered together into one spectacular centerpiece.
Whether you’re preparing it for a birthday, holiday celebration, dinner party, or simply a weekend baking project, this cake is guaranteed to make chocolate and peanut butter lovers happy.
Save this recipe to Pinterest and keep it for the next time you’re craving an unforgettable chocolate peanut butter dessert!