Pumpkin Pretzels

An Easy, Festive & Sweet-and-Salty Halloween Treat
Looking for an easy Halloween treat that looks impressive without requiring hours in the kitchen? These Pumpkin Pretzels are the perfect answer.
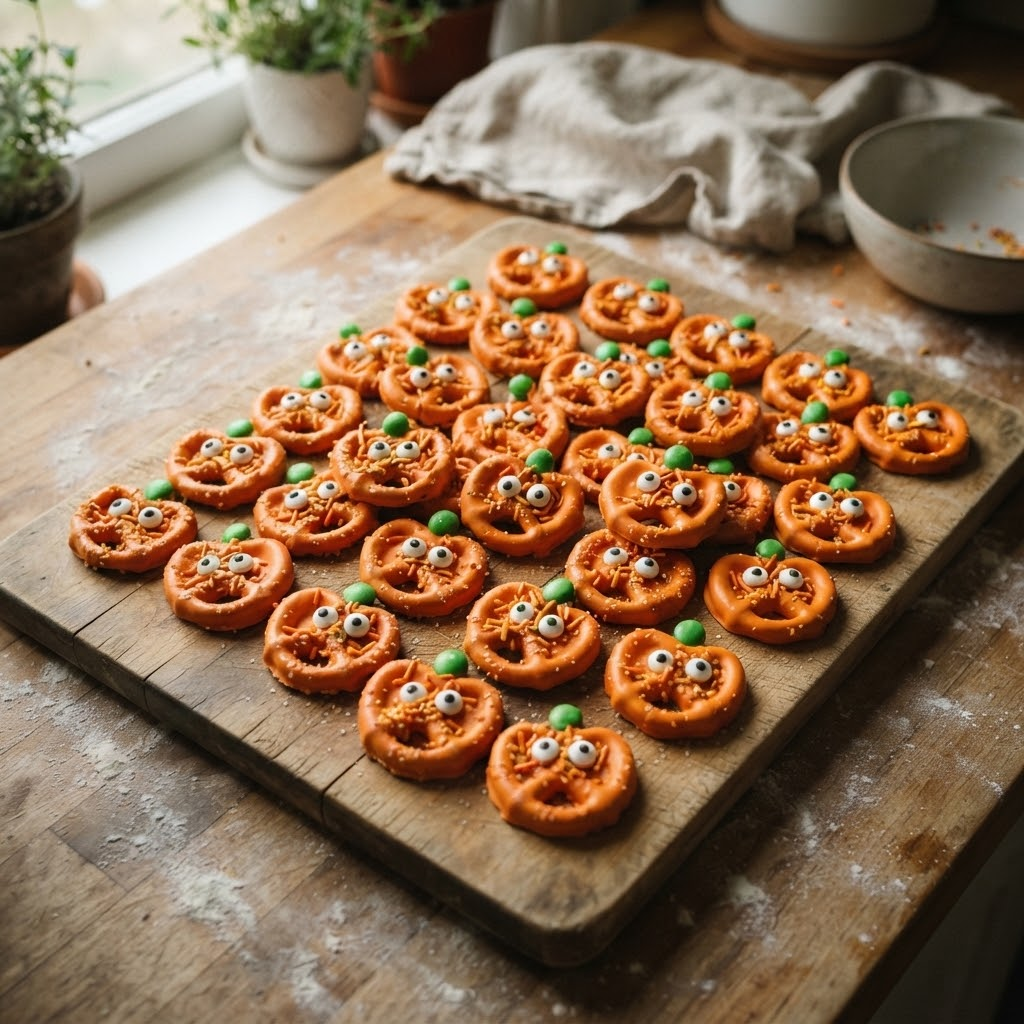
Crunchy pretzels are coated in smooth orange candy melts, then finished with colorful candies and festive sprinkles. The combination of salty pretzels and sweet candy coating creates an irresistible flavor, while the bright orange color gives them an unmistakable pumpkin-inspired Halloween appearance.
Best of all, this is a no-bake recipe. There is no complicated dough, no oven, and no elaborate decorating technique required. Simply melt, dip, decorate, and let the pretzels set.
They make a fantastic addition to a Halloween dessert table, party snack tray, or homemade treat box.
Why You’ll Love These Pumpkin Pretzels
- No baking required
- Ready in a short amount of time
- Uses only a few simple ingredients
- Perfect for Halloween parties
- Great sweet-and-salty combination
- Easy enough for kids to help decorate
- Can be customized with different candies and sprinkles
- Perfect for Halloween treat bags
- Fun addition to fall dessert tables
Ingredients

For the Pumpkin Pretzels
- 12–16 ounces mini pretzels or pretzel twists
- 12 ounces orange candy melts or orange melting wafers
- 1 tablespoon vegetable shortening or coconut oil, optional
- Green M&M-style candies or green candy pieces
- Halloween sprinkles
- Orange and green decorative sprinkles
- Mini pretzel sticks, broken into small pieces, for pumpkin stems
Optional Decorations
- Candy eyes
- Black and orange sprinkles
- Chocolate drizzle
- Green candy leaves
- Mini chocolate chips
- White or brown melting chocolate
How to Make Pumpkin Pretzels

Step 1: Prepare the Baking Sheet
Line a large baking sheet with parchment paper or a silicone baking mat.
This prevents the coated pretzels from sticking while they set.
Arrange the pretzels nearby so everything is ready once the orange coating has been melted.
Step 2: Melt the Orange Candy
Place the orange candy melts in a microwave-safe bowl.
Microwave for approximately 30 seconds at a time, stirring well between each interval.
Continue until the coating is completely smooth.
If the melted candy seems too thick, add a small amount of vegetable shortening or coconut oil and stir until smooth.
Important Tip
Avoid overheating candy melts. Short heating intervals with frequent stirring produce a much smoother coating.
Step 3: Coat the Pretzels
Drop the pretzels into the melted orange candy.
Use a fork or dipping tool to turn each pretzel until it is evenly coated.
Lift the pretzel and allow excess candy coating to drip back into the bowl.
Place the coated pretzel onto the prepared baking sheet.
Step 4: Add the Pumpkin Decorations
While the orange coating is still wet, decorate each pretzel.
Add:
- A small green candy for the pumpkin stem or leaf
- Broken pretzel pieces for additional stems
- Green or orange sprinkles
- Halloween-themed decorations
If you want a more playful version, add candy eyes to create little Halloween pumpkin faces.
Work quickly because the candy coating will begin to set.
Step 5: Let the Pretzels Set
Leave the decorated pretzels at room temperature for approximately 20–30 minutes, or until the candy coating is completely firm.
For faster setting, place the baking sheet in the refrigerator for about 10–15 minutes.
Once completely set, carefully remove the pretzels from the parchment paper.
Expert Tips for Perfect Pumpkin Pretzels
Use High-Quality Melting Wafers
Candy melts or melting wafers are easier to work with than ordinary chocolate because they are designed to melt smoothly and harden firmly.
Don’t Add Too Much Oil
If the coating is too thick, add only a very small amount of shortening or coconut oil at a time.
Too much can prevent the coating from setting properly.
Decorate Immediately
Sprinkles and candies need to be added while the orange coating is still wet.
Once it starts hardening, decorations won’t stick properly.
Keep the Coating Warm
If the melted candy becomes thick while you’re working, microwave it again for about 10–15 seconds and stir.
Don’t Overcrowd the Bowl
Coating a few pretzels at a time makes it easier to achieve an even layer.
Fun Halloween Variations
Mummy Pretzels
Dip the pretzels in white candy melts and drizzle additional white coating across them to create a mummy effect.
Add candy eyes before the coating sets.
Monster Pretzels
Use green, purple, or blue candy melts and decorate with candy eyes, sprinkles, and chocolate details.
Chocolate Pumpkin Pretzels
Use orange candy coating for the base and drizzle melted chocolate over the top to create pumpkin-like lines.
Halloween Sprinkle Pretzels
Skip the candy decorations and simply cover the orange pretzels with a mixture of black, green, orange, and purple Halloween sprinkles.
Pumpkin Patch Snack Mix
Combine the finished Pumpkin Pretzels with:
- Popcorn
- Chocolate candies
- Mini pretzels
- Candy corn
- Cereal
- Pumpkin-shaped candies
This creates an easy Halloween party snack mix.
How to Serve Pumpkin Pretzels
These treats are perfect for almost any fall gathering.
Serve them as part of a:
Halloween Dessert Table
Arrange them on a large platter alongside cookies, cupcakes, brownies, and other Halloween desserts.
Halloween Snack Board
Combine Pumpkin Pretzels with popcorn, chocolate candies, fruit, and other sweet-and-salty snacks.
Kids’ Halloween Party
Place individual portions into small Halloween-themed treat bags.
Movie Night
Serve them alongside popcorn and hot chocolate for a cozy fall movie night.
Halloween Gift Bags
Package several pretzels in clear cellophane bags tied with orange or black ribbon.
Make-Ahead Instructions
Pumpkin Pretzels are ideal for making ahead.
Prepare them 1–2 days before your Halloween event and store them in an airtight container at room temperature.
Keep them away from direct sunlight and heat to prevent the orange coating from becoming soft.
Storage
Store completely cooled pretzels in an airtight container.
Place parchment paper between layers if necessary to prevent decorations from rubbing against one another.
They are best enjoyed within approximately 1 week for optimal texture and freshness.
Avoid storing them in a warm or humid location.
Frequently Asked Questions
Can I use regular chocolate instead of candy melts?
Yes, but the appearance and setting time may be different. Orange candy melts are particularly convenient because they provide a bright pumpkin color without requiring additional food coloring.
Can I make these without a microwave?
Absolutely. Melt the candy coating gently using a double boiler, stirring continuously until smooth.
Can children help make Pumpkin Pretzels?
Yes. Children can help with decorating once the melted coating has been handled safely by an adult.
What type of pretzels should I use?
Mini twists work especially well because they provide plenty of surface area for the orange coating. Pretzel rods and mini pretzel squares can also be used.
Can I use different colors?
Definitely. Orange creates the classic pumpkin look, but purple, green, white, black, and chocolate coatings are perfect for Halloween variations.
How do I prevent the pretzels from sticking?
Always place them on parchment paper or a silicone baking mat while the coating sets.
Perfect for Halloween
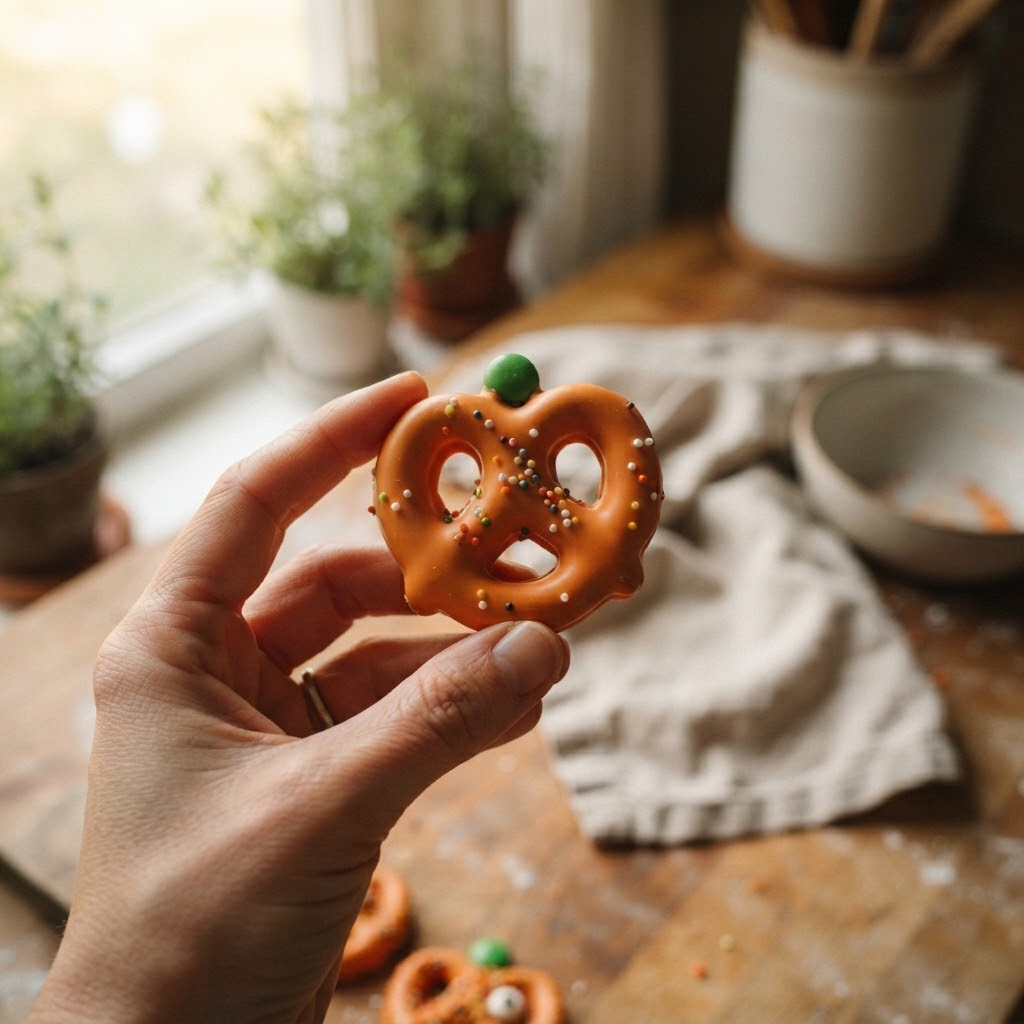
These Pumpkin Pretzels are proof that a festive Halloween dessert doesn’t have to be complicated. With crunchy pretzels, colorful orange candy coating, and a few simple decorations, you can create a snack that looks fun and seasonal with minimal effort.
Whether you’re preparing treats for a Halloween party, school event, fall gathering, family movie night, or spooky dessert table, these sweet-and-salty pretzels are an easy recipe worth making.
Crunchy, colorful, festive, and completely addictive—Pumpkin Pretzels are the perfect little Halloween snack.